Friday, April 3, 2009

Clear the Windows XP Run command's most recently used list


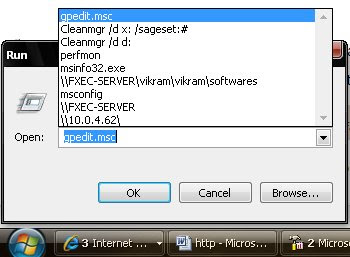
If you regularly use the Run command to launch applications, you know that Windows XP keeps a record in the registry, called the MRU (most recently used) list, of all the applications you recently launched. When you have the Run dialog box open, you can access the MRU list by clicking the drop-down arrow adjacent to the Open text box.
The MRU list is designed to make it easier for you to re-launch the same applications at a later date. However, this list can grow quite long, making it difficult to find what you want.
Fortunately, you can create a registry shortcut that clears the Run command's MRU list. To do so, follow these steps:
1. Launch the Registry Editor (Regedit.exe).
2. Go to HKEY_CURRENT_USER\Software\Microsoft\Windows\CurrentVersion\Explorer\RunMRU.
3. Right-click on the RunMRU key and select Export.
4. Name the REG file Clear Run MRU, click the Save button, and close the Registry Editor.
5. Open the Clear Run MRU.reg file in Notepad.
6. Add a minus sign to the beginning of the key name just inside the square brackets.
7. Delete all lines that follow the line containing the key path.
8. Save the file and close Notepad.
Reboot Windows (or at least log off and then log back on) to make this change effective. Now, any time you want to clear the Run command's MRU list, simply locate and double-click the Clear Run MRU.reg file.The Registry Editor will then display two dialog boxes: one that prompts you to confirm the operation and one that lets you know the operation was successful.

Speed up Windows XP's defrag operations


A simple way to speed up a defrag operation in Windows XP is to restart the system before you launch Defrag. This allows the operating system to clear out the swap/paging file and reset it to the default size. This lets Defrag focus strictly on the necessary data on the hard disk without having to stop and manage a huge swap file loaded with unneeded data.
Another approach to speeding up a defrag operation in Windows XP is to configure it to occur immediately upon startup. Fortunately, you can do so easily with this simple registry edit:
1. Launch the Registry Editor (Regedit.exe).
2. Go to HKEY_LOCAL_MACHINE\SOFTWARE\Microsoft\Windows\CurrentVersion\RunOnce.
3. Right-click on the RunOnce subkey and select New String Value.
4. Name the value Defrag and press [Enter] twice.
5. Type Defrag.exe c: /f in the Value Data text box and click OK.
6. Close the Registry Editor and restart Windows.
The defrag operation will begin when you type in your password and press [Enter]. (Keep in mind that values added to the RunOnce key are removed immediately after the command has been run.)

Schedule a restart operation with Windows XP's Shutdown utility


Wouldn't it be nice if each morning your Windows XP machine restarted before you got to work so you had a fresh system to work on each day?
To help you automate this type of operation, Windows XP comes with a command-line utility called Shutdown.exe, which can restart your system. To make this happen automatically, you can configure it to run at a specified time with the Scheduled Tasks tool. Here's how:
1. Go to Control Panel Scheduled Tasks.
2. Double-click Add Scheduled Task to launch the Scheduled Task Wizard.
3. Click Next and then click the Browse button.
4. Access the Windows\System32 folder, select Shutdown.exe, and click Open.
5. Follow the wizard through the next two screens to give the task a name and choose a schedule.
6. Enter your user account name and password and click Next.
7. Select the Open Advanced Properties check box and click Finish.
8. In the task's Properties dialog box, add the /r parameter to the end of the command line in the Run text box and click OK. (Be sure to include a space between the last character in the command name and the first character in the parameter list.)
9. Enter your user account name and password and click OK.
When the Shutdown utility runs, you'll momentarily see a small dialog box on your screen before the system restarts.

Disable Windows Messenger on a Windows XP machine


If you're using MSN Messenger as your chat and videoconferencing tool, you may never use Windows Messenger anymore and have removed it from the startup group to keep it out of your way. However, you may have seen it pop up on occasion and had to struggle with closing it down. The reason that Windows Messenger makes these impromptu appearances is that Outlook, Outlook Express, and even some Microsoft Web pages can still make it load automatically. Fortunately, you can banish Windows Messenger from your desktop by making an alteration to the local group policy with the Group Policy Editor. Here's how:
1. Access the Run dialog box by pressing [Windows]R.
2. In the Open text box type Gpedit.msc and click OK to launch the Group Policy Editor.
3. Go to Computer Configuration Administrative Templates Windows Components Windows Messenger.
4. Double-click the Do Not Allow Windows Messenger To Be Run setting.
5. In the resulting dialog box, select the Enabled option and click OK.
6. Close the Group Policy Editor.